
Gemini is a leading, .NET based help desk, issue and bug management platform.
Easy to install, maintain and can be fully customized. Gemini can take care of your help desk operation and SLA by integrating it with Exchange, Gmail and any other email provider. It is used by small, medium and large organizations. If you need to bridge the gap between IT and the rest of the business then Gemini is the tool for you.
FormTitan may now be integrated with Gemini, allowing users to push the data entered in their forms straight to this bug management platform.
Following are steps to integrate with Gemini
| 1- | Open the form you would like to integrate in the Form Builder.. |
| 2- | Go to "Properties Panel" > "Form" tab > "Settings" > "Integrations" Category > "Push notification" - Press on "Set Notifications"  |
| 3- | In the first wizard step: Choose Platform, select "Gemini". |
| 4- | In the Second wizard step: Platform Parameters - enter the requires details:. |
| 5- | In order to authenticate with Gemini you will need to enter your "Gemini API domain", "User name" and "api key". |
| 6- | Gemini API domain - copy this from the url box, when you are logged in to your Gemini account. |
| 7- | User name - copy this from your user Profile > Username. |
| 8- | API Key - copy this from your user Profile > Password tab > API Key. |
| 9- | Press on the "Authenticate to "Gemini" button |
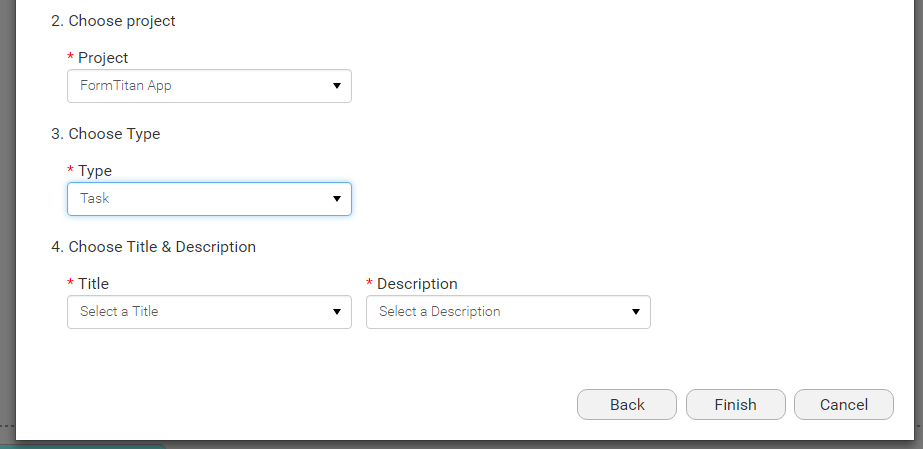
| 10- | Choose Project - Once you are Authenticated to Gemini your project list will update according to the projects in your Gemini account. You will need to select the project you would like to push the data in to. |
| 11- | Choose type - choose the type (Task, Story, etc) |
| 12- | Choose Title Á Description - Choose the title and description given to each submission pushed to Gemini. |
Example for how the integration really works
Now that your form is configured to integrate with Gemini - a user will fill in your form and then:
| 1- | A new item -task/story/bug/other type you chose will be added "issues" grid. (according to the "Type" you chose in your push configuration). |
| 2- | This item will appear under the project you chose in your configuration process |
| 3- | The name and description of the issue will be taken from the entry according to the fields you chose. |
| 4- | Inside the issue you will find an attachment containing all the fields entered in your form. |