

Configure Email Settings
Business Background
Configure an email for your web project in a few clicks with no code.
Titan Solution
Titan Web lets you configure the email settings in your Web project. You can trigger the sending of an email throughout your project whenever necessary.
How to Video
Coming soon!
How to Guide
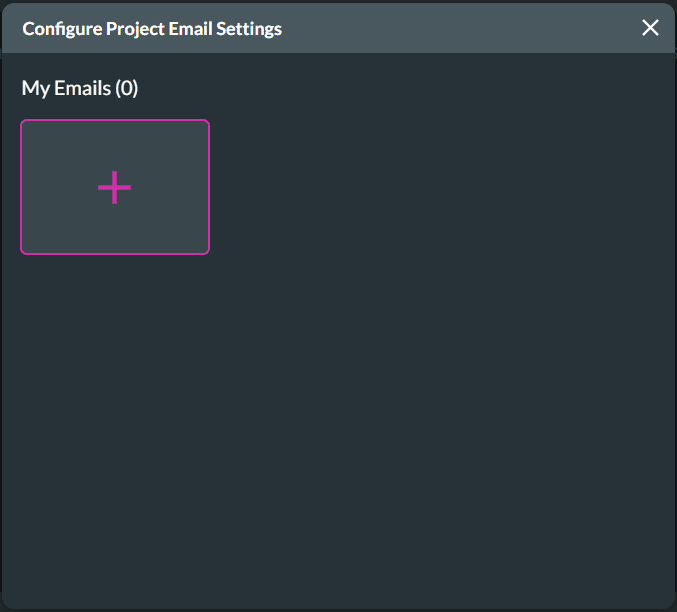
Project Settings > Tools > Emails > Gear icon

- Click the + button. The Configure Email Settings screen opens on Email settings by default.
There are five steps to complete.
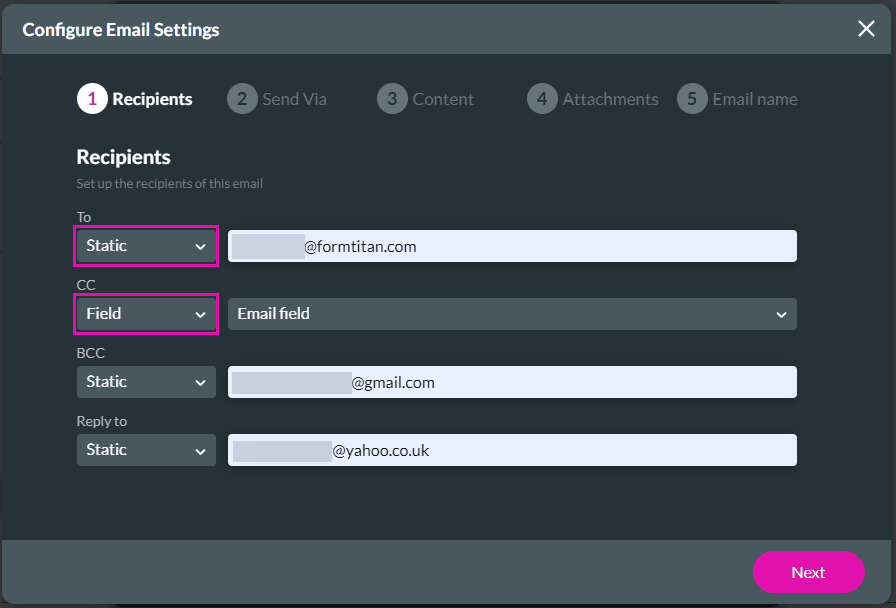
- Recipients (The To field is mandatory.)
- Send Via
- Select either Salesforce (default) or Titan.
- The processes are slightly different and the choice affects how 3. Content is configure.
- Content (For Salesforce – Manual and Titan, the Subject field and the Body are mandatory.)
- Attachments
- Email name (The name and description fields are mandatory.)
- Under Recipients, set up the recipients of the email.
- Add a Static or Field value for the To option. This is mandatory.
- Static: Type the email address/es in the field.
- Field: Use the drop-down list to select a field.
- You can add CC, BCC, and Reply to fields as well. These are optional.
- Add a Static or Field value for the To option. This is mandatory.
- Click the Next button.
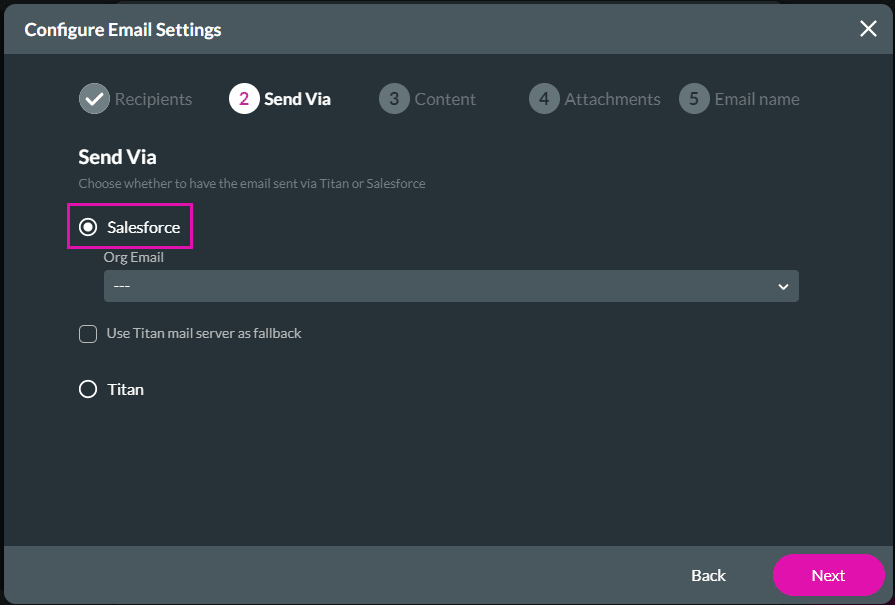
- Under Send Via, you have two options with which you can send the email:
For Salesforce:
We recommend you send emails via Salesforce or your own SMTP server.
- Send via Salesforce. This is the default option:
- Use the drop-down list to select an organizational email address. This is mandatory.
- If necessary, click the Use Titan mail server as fallback checkbox to add it as an option.
- Click the Next button.
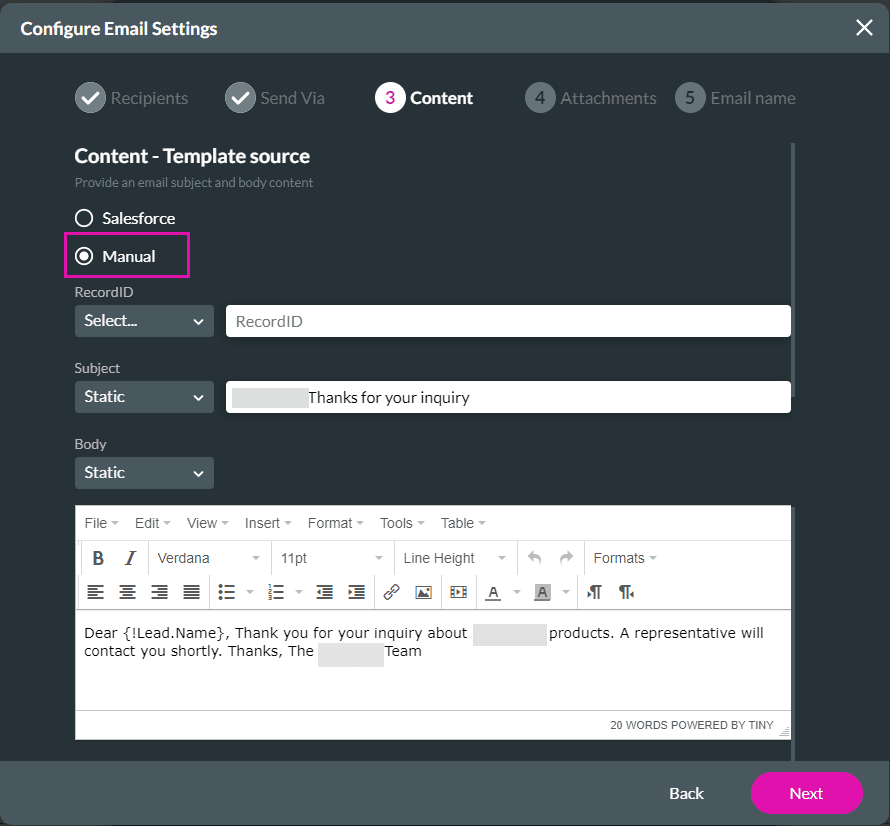
- Under Content, do as follows. These options apply when you use Salesforce to send the email.
- Use the drop-down lists to select the following:
- Folder
- Template
- RecordID
- Static: Type a recordID in the field. This will link the email to the Email Activity in the record.
- Field: Use the drop-down list to select a recordID.
- Click the Next button.

- Alternatively, click the Manual radio button to manually edit the email sent via Salesforce. The fields were completed by default when you selected the template.
- Use the drop-down lists to select the following:
- RecordID
- Static: Type a recordID in the field.
- Field: Use the drop-down list to select a recordID field. This will link the email to the Email Activity in the record.
- Subject
- Static: You can change the subject that was added by default when you selected the template.
- Field: Use the drop-down list to select a subject field.
- Body
- Static: Make changes to the template in the body field.
- Field: Use the drop-down list to select a body field.
- RecordID
- Click the Next button.
For Titan:
When using the Titan mail server and three emails bounce (for instance, when the receiving email server is temporarily unavailable, was overloaded, or couldn’t be found), the system will block all emails from that account for three days. The emails will be released after this period unless three more emails bounce.
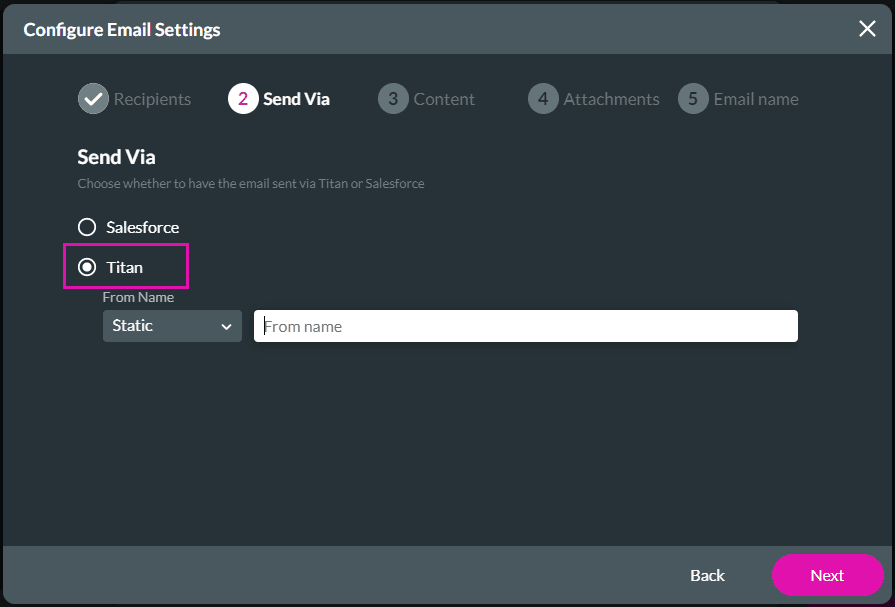
- Alternatively, under Send Via, select Titan.
- Click the Titan radio button.
- Add a Static or Field value for the From Name option.
- Static: Type the name in the field.
- Field: Use the drop-down list to select a field.
- Click the Next button.
- Under Content, do as follows. These options apply when you use Titan to send the email.
- Add Static content:
- Add the subject as a static value: Type the subject in the Subject field. This is mandatory.
- Add the email body as a static value: Use the Rich text Editor to add the email body. This is mandatory.
- Alternatively, add the content as Field values.
- Use the drop-down lists to select the subject and body fields. These are mandatory fields.
- Add Static content:
- Click the Next button.

If necessary, use the All elements drop-down list to add elements to the email body.

- Under the Attachments option, use the drop-down list to select any attachments.
- Use document generation to configure the document/s before they can be attached:
- Word
- Excel
- Auto PDF
Titan Web > Project Settings > Tools > Document Generation > Gear icon

- Add a File Upload element.
- Use the drop-down list to select an option.

- Click the Next button.
- Under the Email name option, type the following:
- Configuration name. This is mandatory.
- Description. This is mandatory. There is a 65-character limit on this field.
- These two fields are shown when the email configuration is added to the Configure Project Email Settings screen.
- Click the Apply button.

The email is added to the screen.


- The logo shows whether the email is sent with Salesforce or Titan. In this example, it is being sent with Titan.
- Use the edit icon to edit this email.
- Use the Kebab icon to do one of the following:
- Clone: Click this option to clone the email configuration.
- Where used: Click here to open the Where used screen. You will be able to see where this email is used.
- Turn Off: Click this option to turn of the email configuration.
- Delete: Delete the email configuration.
- This is the mandatory Configuration name added under 5. Email name.
- This is the mandatory Description added under 5. Email name.
- The attachment icon is added if the email has an attachment.
When you have configured multiple emails, click on an option to select it. The pink frame shows which option was selected. The Configure Project Emails Settings screen closes automatically when you have selected an option.
