

FT Doc Gen Button for Salesforce Document Generation
Business Background
Create the FT Document Generation button and add it to your page layout in Salesforce. In most standard objects, the FT buttons are created automatically for you by Titan; however, if you want to add an FT button to a custom object page for Salesforce document generation, you must first create the button and then add it to the layout.
Titan Solution
Add the FT Doc Gen button to your object.
There are two types of FT Doc Gen buttons you can add:
- The Detail Page button is added to the record page.
- The List View button is added to the List view page. You can select multiple records and use the button for all the records.
How to Video
Coming soon.
How to Guide
Prerequisite:
1. On the Titan Forms project, make sure that you configure the Word mapping.
2. Click the Configure button under the Salesforce button.
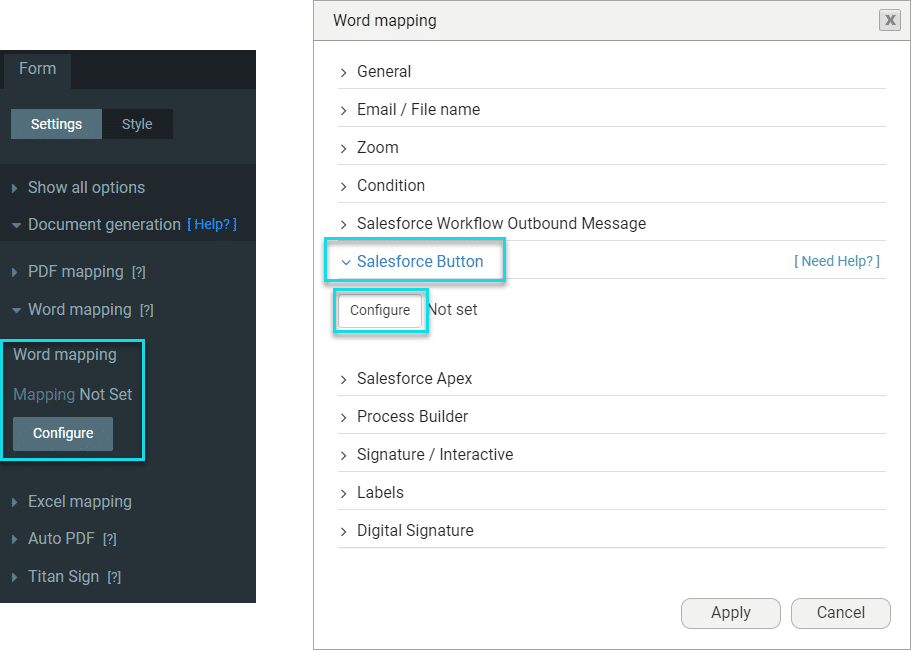
3. Select an object and map the record ID to the Form.

Detail page button
Add the button to the record view in an object.
- Open the object where you want to add the FT Doc Gen button.
- In this example, the Contacts object is used.
- Click the Gear icon and select the Edit Object option.

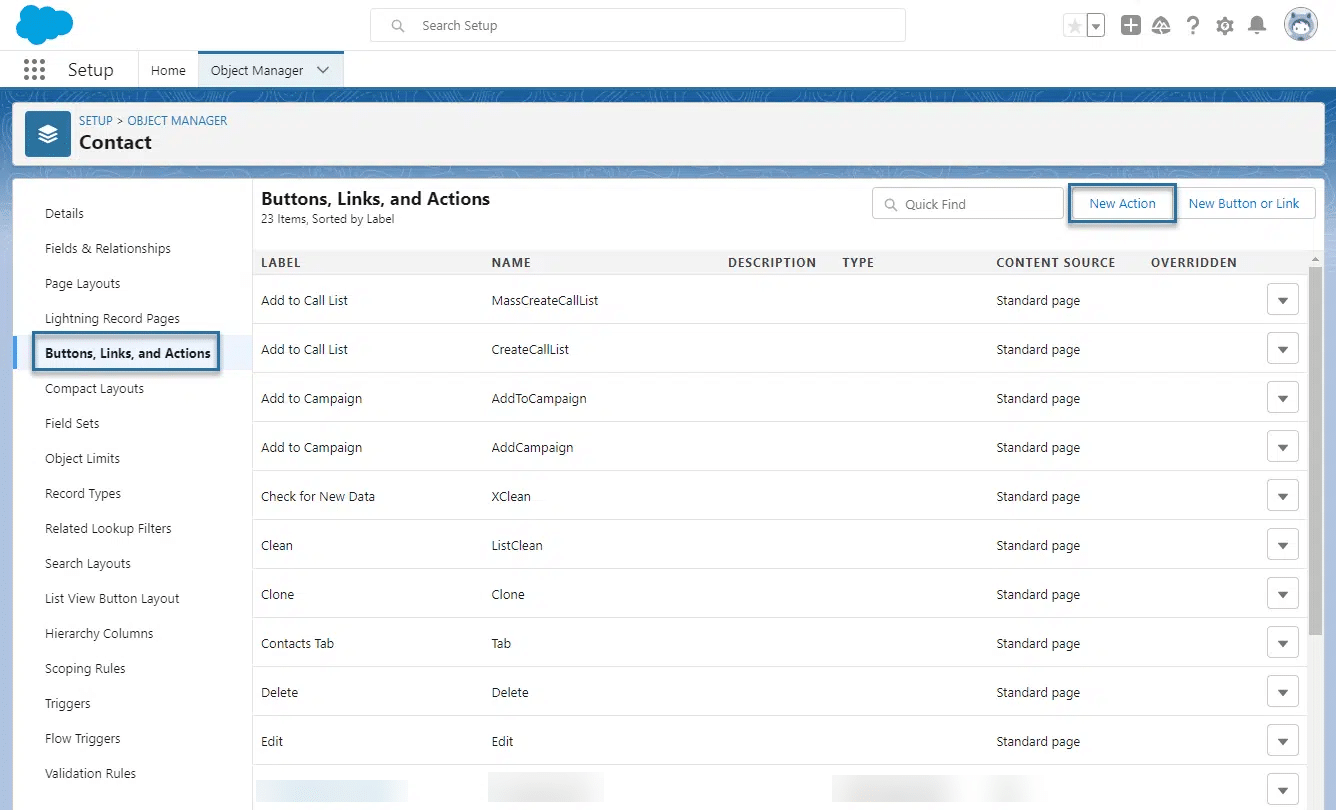
- Select the Buttons, Links and Actions option and click the New Action button.
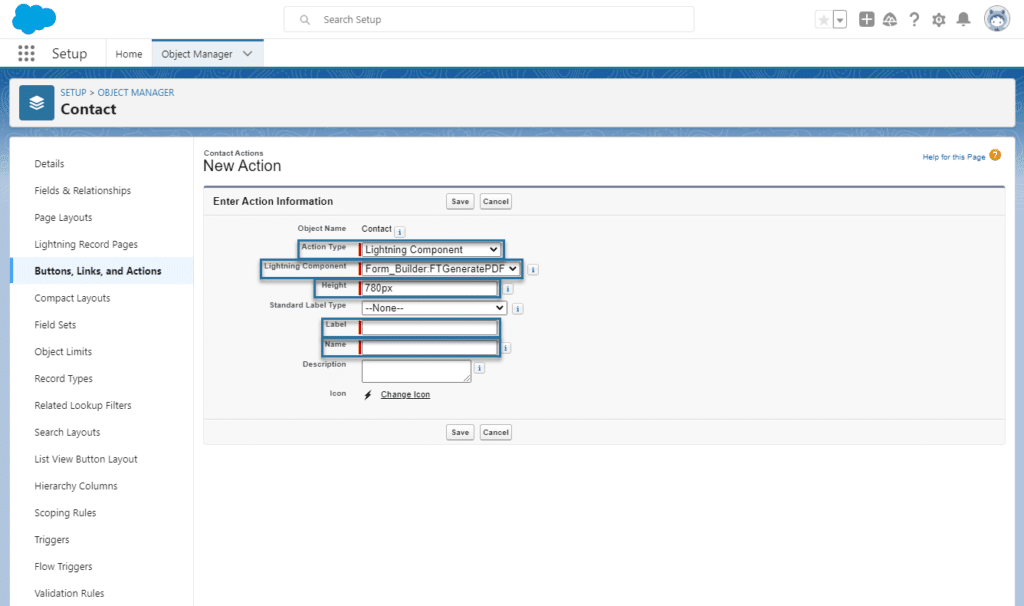
- Use the Action Type drop-down list to select the Lightning Component option.
- Use the Lightning Component drop-down list to select the Form_Builder:FTGeneratePDF option.
- Change the height of the modal. We recommend that you set the height to 780px.
- Add a Label in the field. This is the button label that the user will see.
- Add a Name in the field. This is the API (system) name.
- Click the Save button.
- View the new action added and click on the Object Manager tab.

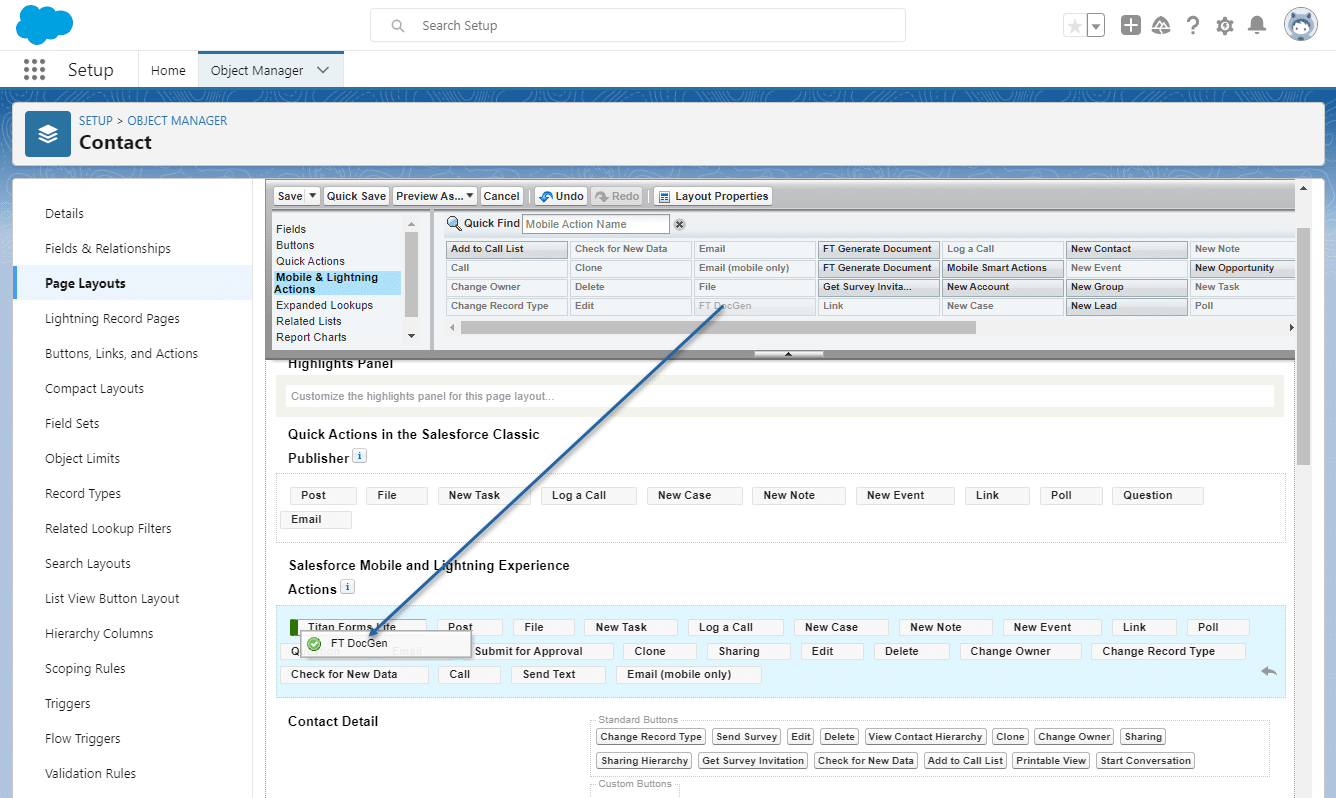
- Select the Page Layout option for the object and click the Mobile & Lightning Actions option. The newly added button is in the list for Salesforce document generation.

- Drag and drop the new button to the Salesforce Mobile and Lightning Experience section and click the Save button.
- Refresh the Contacts page and select a specific contact in the list. The new button has been added to the record.
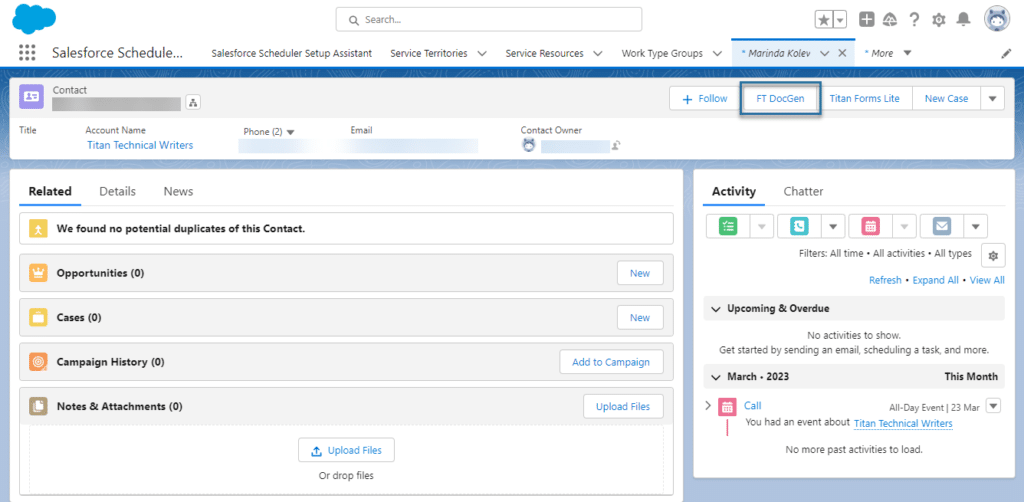
When the user clicks the button, the Document Generation modal opens with a list of the templates to which the specific user has access.
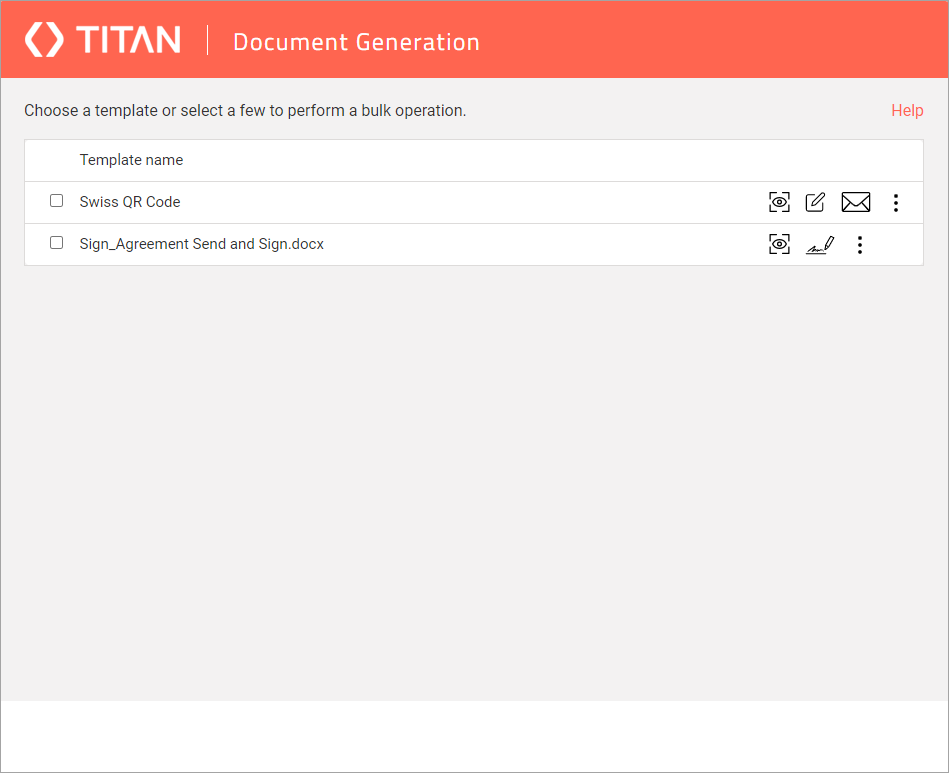
The height of the modal in this example is 780 px.
List View button
Add the button to the List View.
- Open the object where you want to add the FT Doc Gen button.
- Click the Gear icon and select the Edit Object option.

Create a new button
Create a Visual Force Page
- On the Home tab, search for “visualforce” and click the Visualforce Pages option.
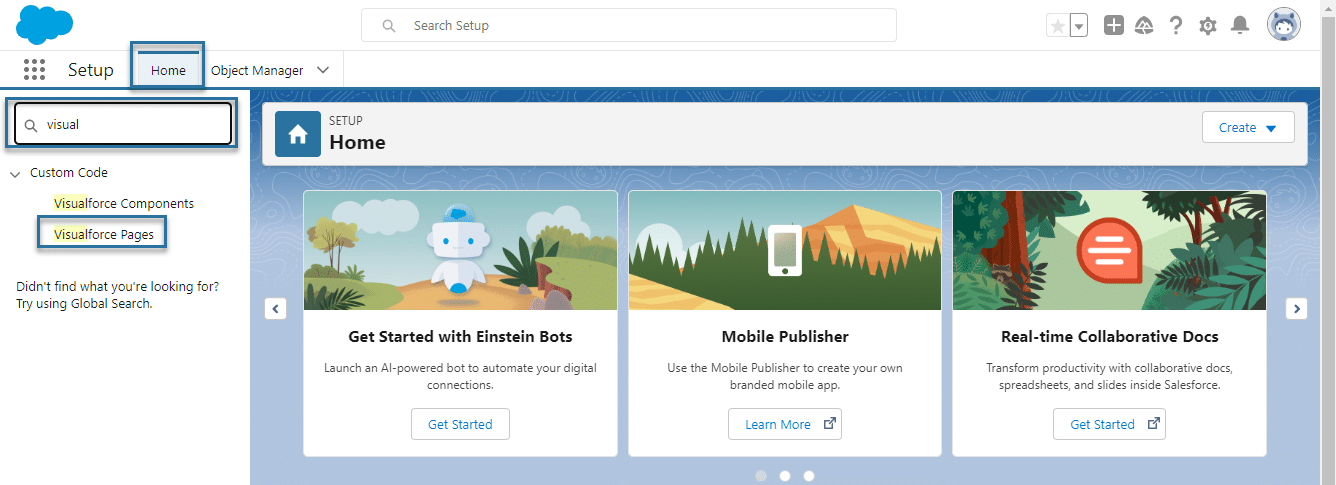
- Click on the New button to create a new Visualforce Page.

- Copy the code below.
<apex:page standardController="yourCustomObjApiName__c" recordSetVar="recVar" sidebar="true" lightningStylesheets="true" >
   <apex:includeLightning />
   <apex:form >
    <apex:pageBlock title="Generate Multiple PDF" >
       <apex:pageBlockButtons location="top">
            <apex:commandButton value="Back" action="{!cancel}"/>
        </apex:pageBlockButtons>
        <apex:outputText rendered="{!IF( selected ='' ,true,false)}">
            <apex:pageMessage severity="error" strength="1" summary="{!$Label.form_builder__please_choose_at_least_1_record}" />
        </apex:outputText>
    </apex:pageBlock>
    <div id="lightning" />
        <script>
            var recids = '{!selected}';
            recids = recids.replace(']','');
            recids = recids.replace('[','');
            recids =  recids.replace(/\s/g, '');
            if(recids.length>0){
                $Lightning.use("Form_Builder:FTPDF", function() {
                 $Lightning.createComponent("Form_Builder:FTGeneratePDF",
                  { recids : recids }, "lightning",
                  function(cmp) {});
                });
            }
        </script>
    </apex:form>
</apex:page>- Delete the default code and paste the code you copied from above in the field.
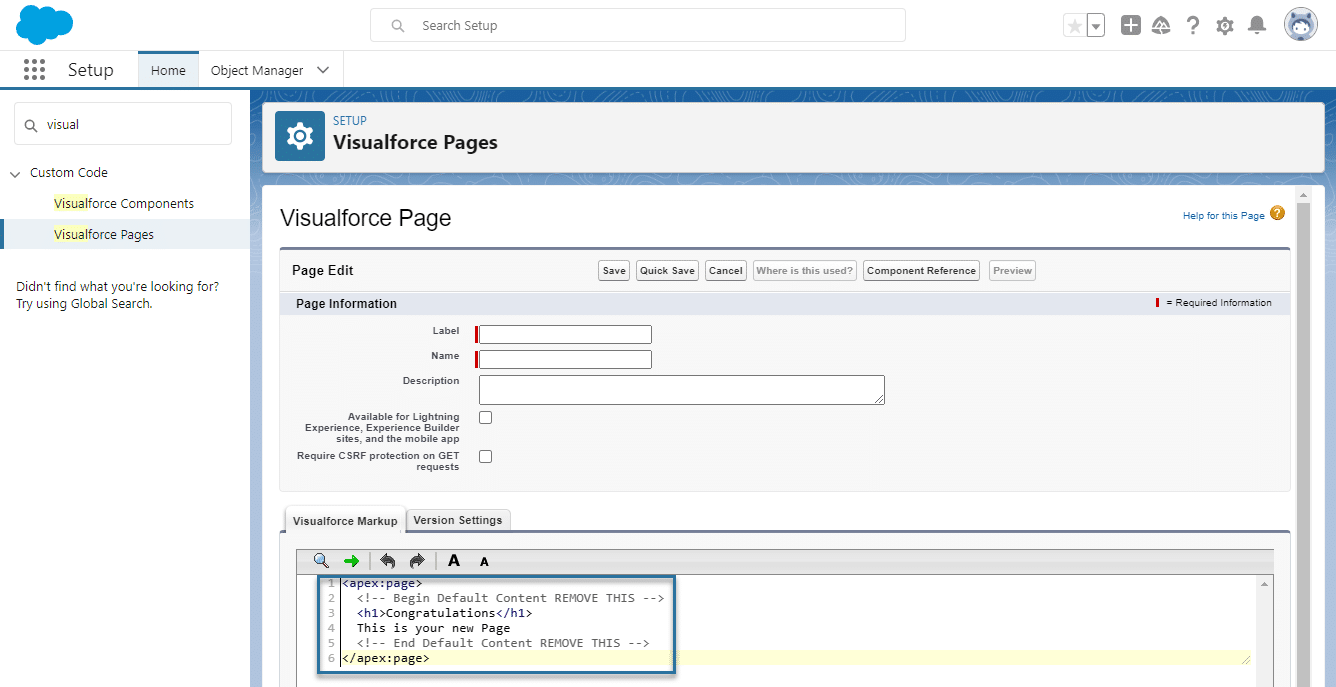
- Add a Label in the field. This is the button label that the user will see.
- Add a Name in the field. This is the API (system) name. The API name must have underscores (_) instead of spaces between words.
- Click the Available for Lightning Experience, Experience Builder sites, and the mobile app checkbox.
- Change the “yourCustomObjApiName__c” field to the name of your custom object, for instance, “Birthdays__c.”
Makes sure that you use the API name of the custom object and not the name.
- Click the Save button.

- View the new Visualforce Page and click the Object Manager tab.

Create a button from the Visualforce Page
- Search for your custom object.
- Select the Buttons, Links and Actions option on the custom object and click the New Button or Link button.

- Add a Label in the field. This is the button label that the user will see.
- Add a Name in the field. This is the API (system) name. The API name must have underscores (_) instead of spaces between words.
- Select the List Button radio button.
- Use the Content Source drop-down list to select the Visual Page option.
- Use the Content drop-down list to select the Visual Page name if you have more than one VisualForce Page relevant to this custom object.
- Click the Save button.

Add the button to the Layout
After you have created a new button, it will be available in the list to select. Buttons that are part of the Titan package will also be listed here.
- Select the List View Button Layout option and use the drop-down arrow to access the Edit option.
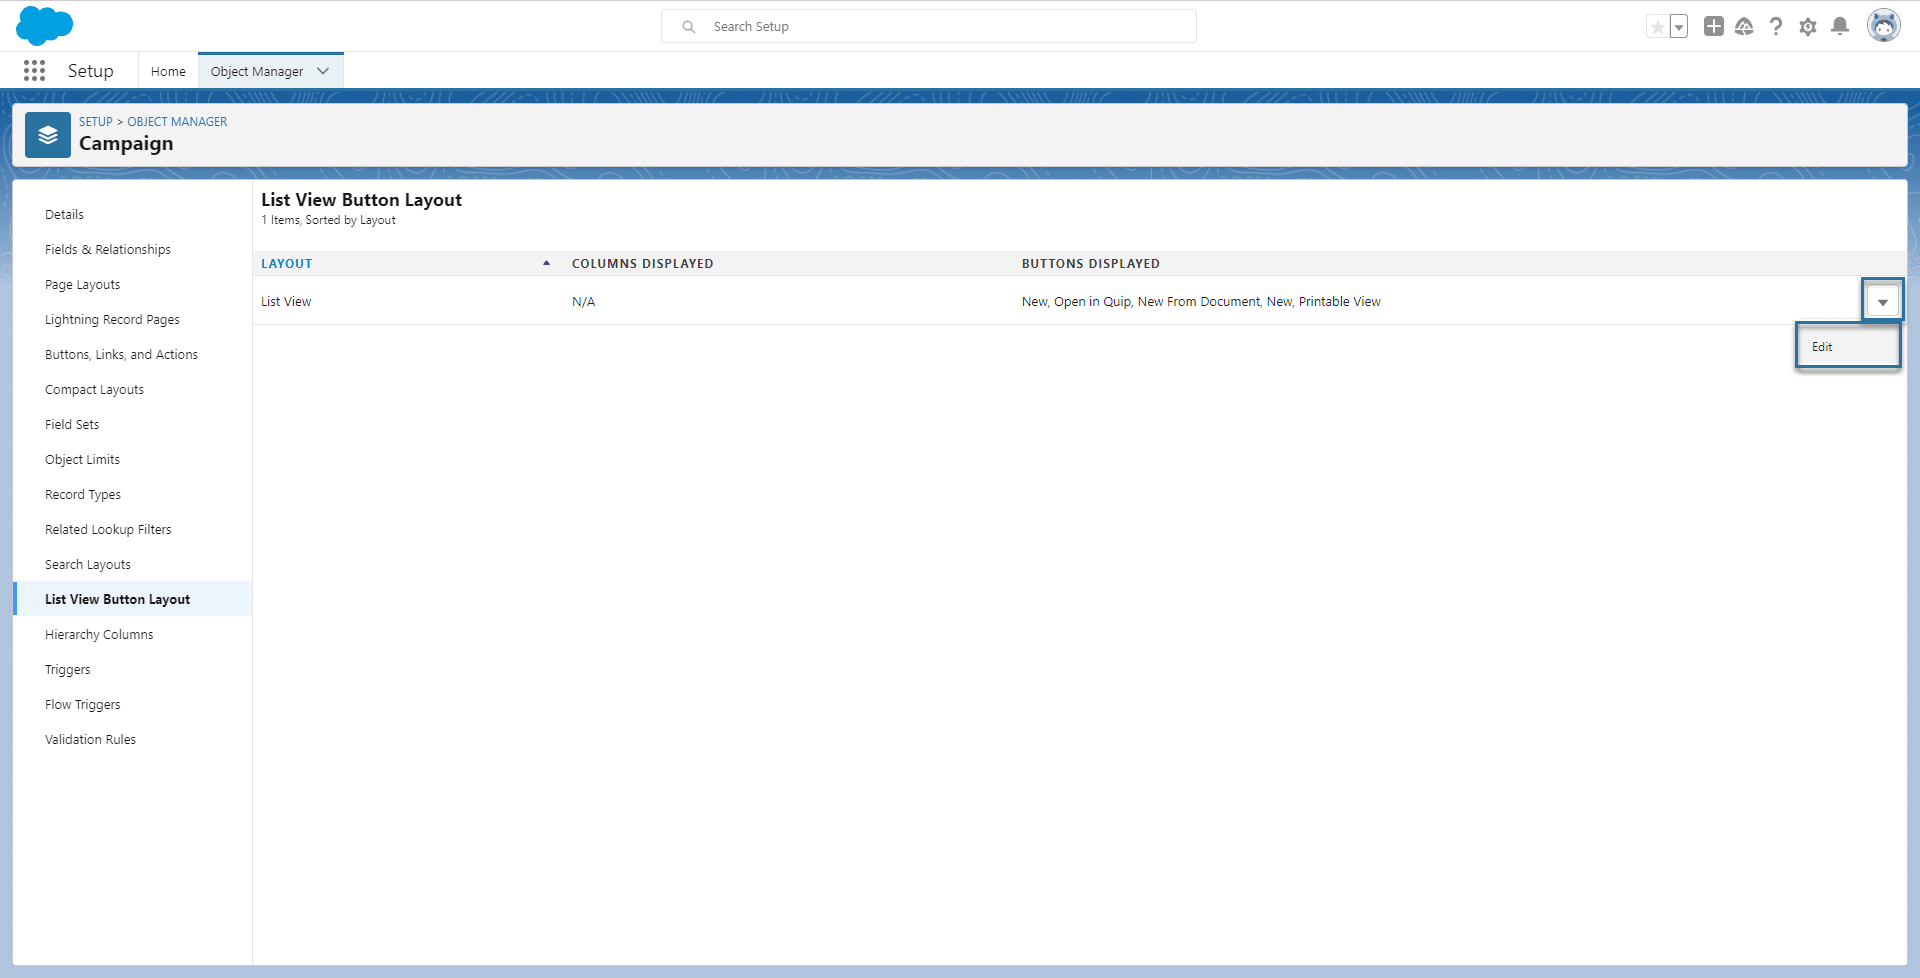
- Under Available Buttons, click the button that you added with a Visualforce Page and select the arrow icon to move it to the right. The button is moved to Selected Buttons.
- Click the Save button.

The button is added to the List View layout.

You can now use the button on the object.

If you cannot see the button in Salesforce, use the drop-down arrow and click on the FT Doc Gen option.

If you are interested, check out our Salesforce document generation article for a comparison of the 10 best tools in the market.