

Configure Salesforce LWC
Business Background
Do you need to embed your Titan Web project in Salesforce? And how would you like to get a Salesforce LWC Dynamic Form fast? You can do that in a few clicks with no code.
Titan Solution
- Use the Salesforce Lightning Web Component to invoke access to an external Titan Web project where users in your Salesforce community will be able to use the project.
- A Lightning Web Component project can only be accessed from Salesforce.
How to Video
- 00:00 An introduction on how to configure a Salesforce LWC in Titan Web.
- 0:11 Prerequisites for your project.
- 0:39 See how to configure an LWC in Titan Web.
- 3:20 Watch how to add a Titan LWC in Salesforce.
How to Guide
Prerequisites:
- Create a Titan Web project with the elements to suit your business needs, for instance, charts that get information from Salesforce or Titan’s Salesforce forms that create (push) a new contact to Salesforce.

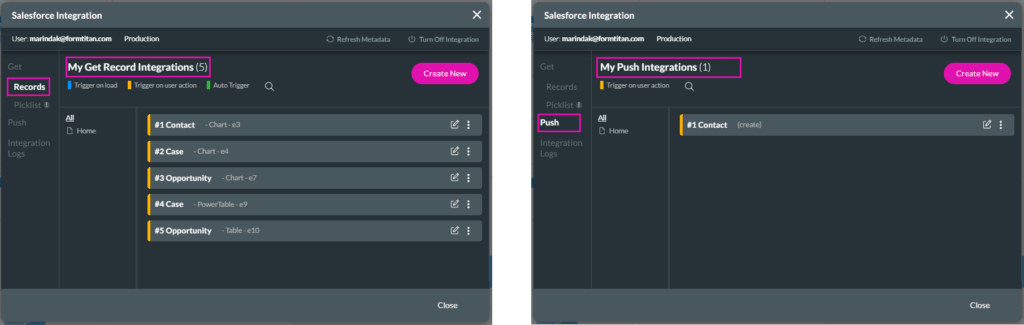
- Configure Salesforce integration, for instance, Get Record Integrations or Push Record Integrations.
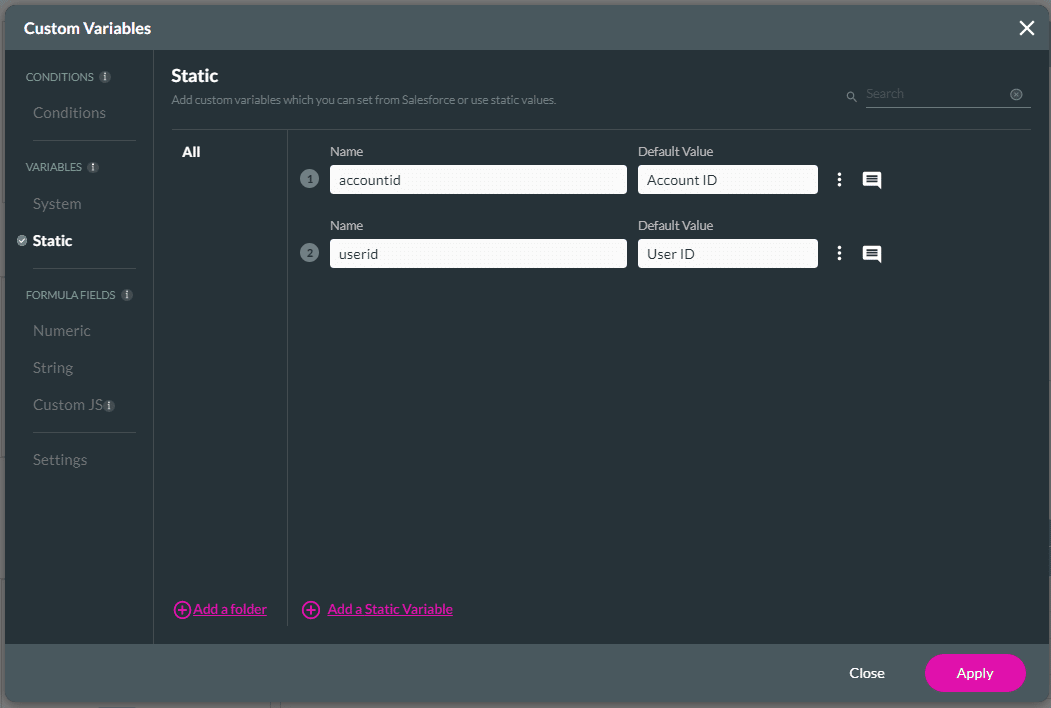
- Create Static variables, for instance, account ID and user ID.
Configure Lightning Web Component in Titan Web
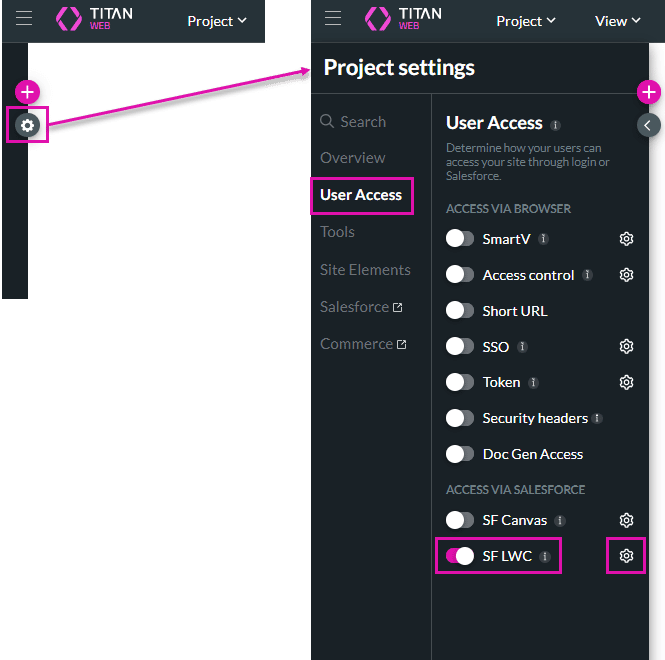
- Click the Gear icon to open the Project Settings.
- Select the User Access option and use the toggle switch to turn SF LWC on.
- Click the SF LWC Gear icon to open the configuration screen.
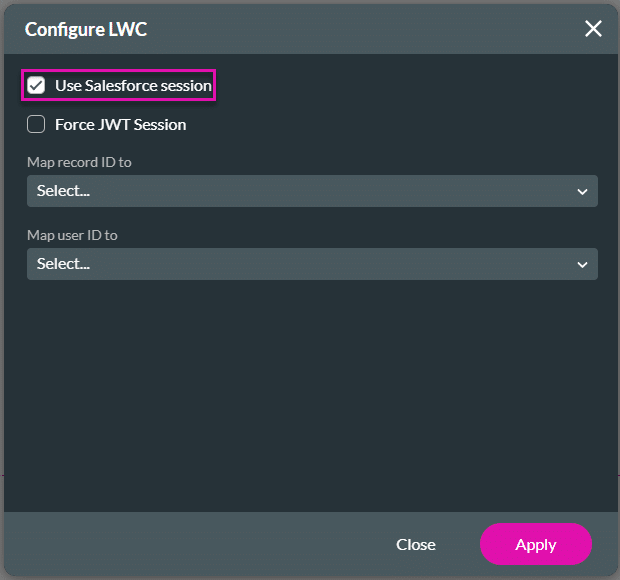
- Click the Use Salesforce session checkbox to allow multiple users in your Salesforce.
You can have community or standard users in Salesforce with different profiles. Any Salesforce Push or Get will run on the logged in user’s profile. For instance, if a community user creates a new contact in Salesforce, the contact will be created with that user’s profile details. If the logged in user doesn’t have the permissions to create a new user, they will not be able to do so. It is suggested that you make sure that the users who have access to the Web project in Salesforce, also have all the necessary permissions to use all the objects.
- If necessary, click the Force JWT Session checkbox.
- For more information about JWT, click here.
The JWT* enables identity and security information to be shared across security domains. Salesforce validates the JWT based on a signature using a previously configured certificate and additional parameters. Assuming that the JWT is valid and that the connected app has prior approval, Salesforce issues an access token. Titan authenticates on the server side between Salesforce Experience Cloud and Titan and will use the JWT to run the user’s session.
* JSON Web Tokens
- Add the custom audience in the field.
- This is optional.
- For Standard Users, the custom audience is http://login.salesforce.com/
- For Community Users, use the community URL.
- The easiest way to obtain this URL is by opening Setup in Salesforce, searching for Domains, and then clicking on Add Domain.
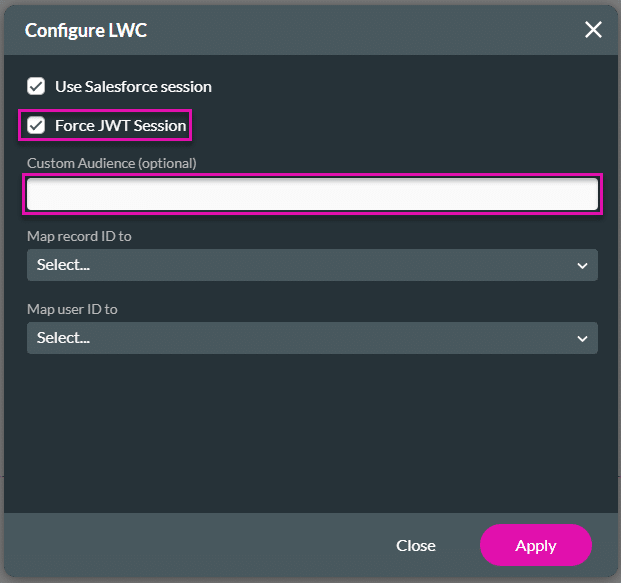
- Use the drop-down list to select the record ID to map to in Salesforce.
- Use the drop-down list to select the user ID to map to in Salesforce.
- This user uses the Salesforce session, and you can map them to a variable on Titan Web.
- The User ID comes from Salesforce. It lets you see who is running the Lightning Web Component in Salesforce.
- Click the Apply button.
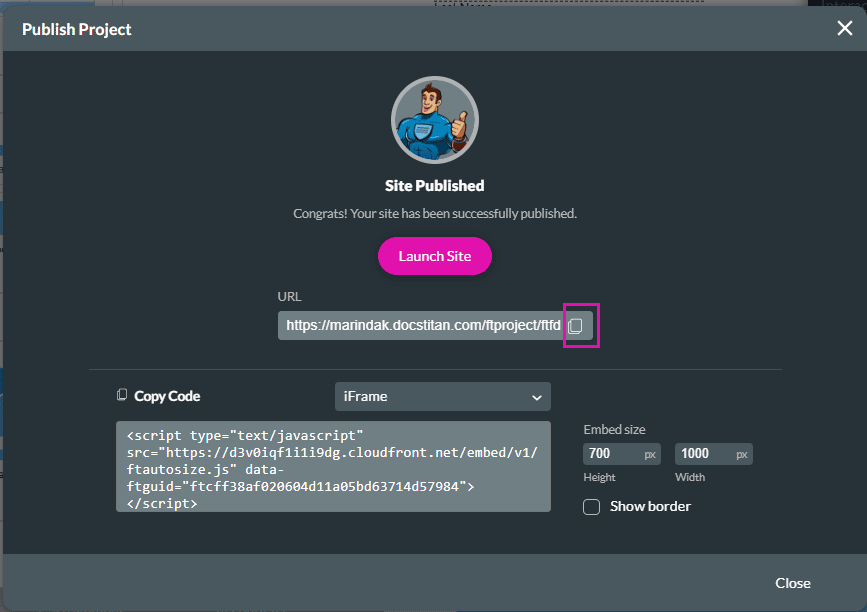
- Save and Publish the project.
- Copy the project link. You will need this when you add the Titan LWC object to Salesforce. Refer to this step.
Add Titan LWC in Salesforce
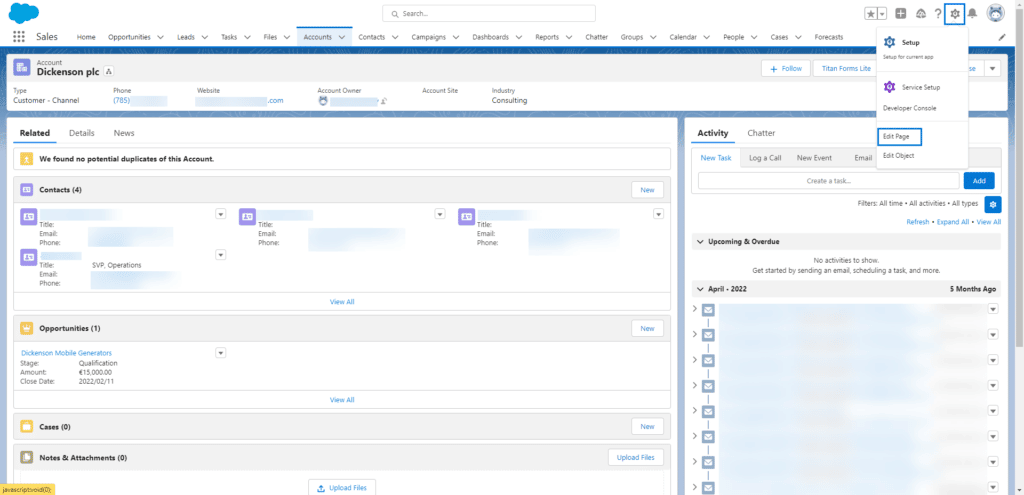
- Open the object in Salesforce where you want to add the Titan Web project, for instance, an account.
- Click the Gear icon in the top right corner of the page and select the Edit Page option.
If there is a warning message: “Select an insertion point for the component, either in an empty region or before or after another component,” click the OK button.
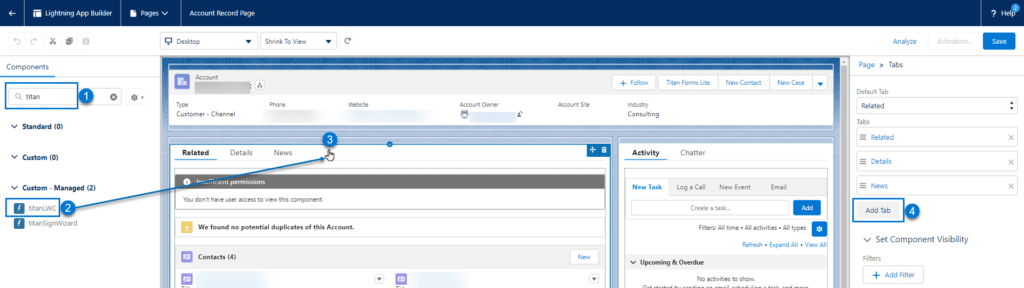
- Search for the Titan component (1). The titanLWC component is listed (2).
- Select the object where you want to add the new tab (3).
- Click the Add Tab button (4). A new tab called Details is added.
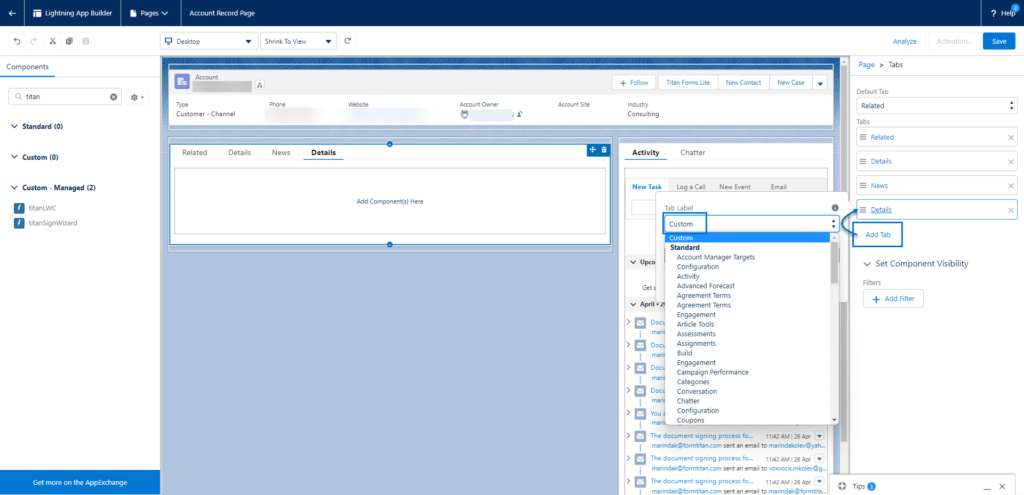
- Select the Details tab to open the Tab Label popup and scroll to the top of the drop-down list.
- Choose the Custom option. This lets you add a custom name for the tab.
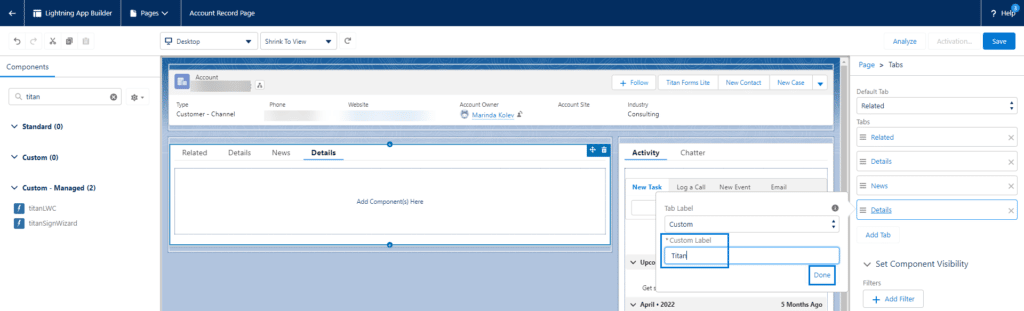
- Type a custom name in the field, for instance, “Titan,” and click the Done button.
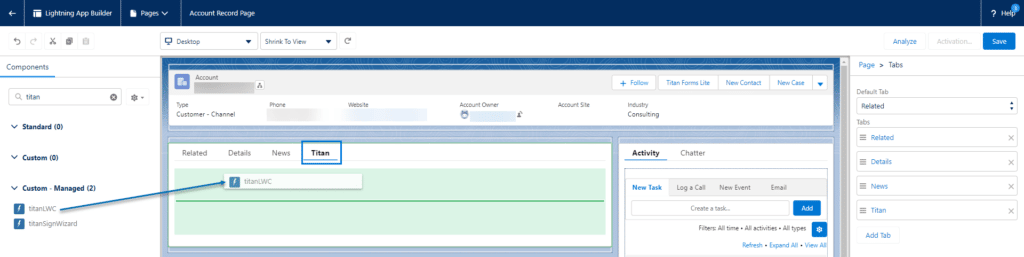
- Make sure that the new tab is open. You will see the message: “Add Component here.”

- Drag the titanLWC component to the tab.
- Paste the Web project link in the titanURL field. Refer to this step.

- Click the Save button in the top right corner of the screen.
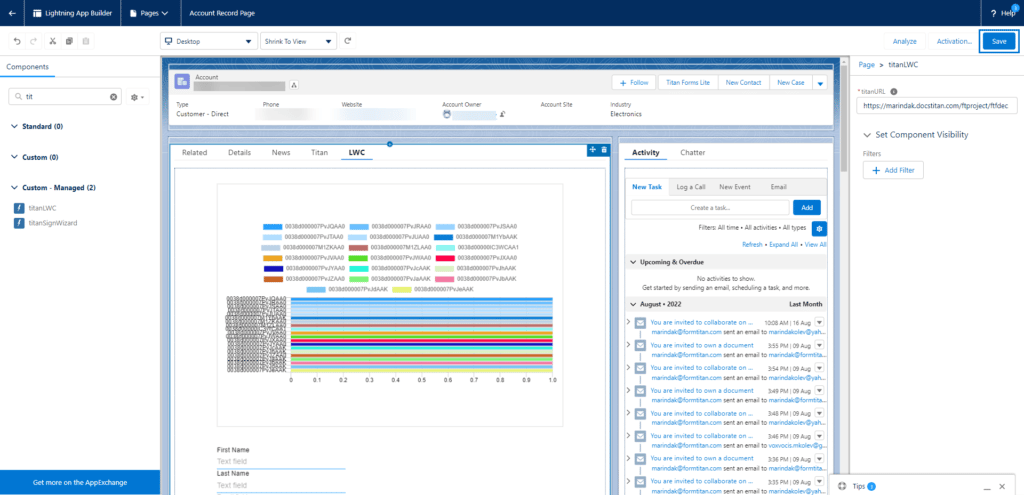
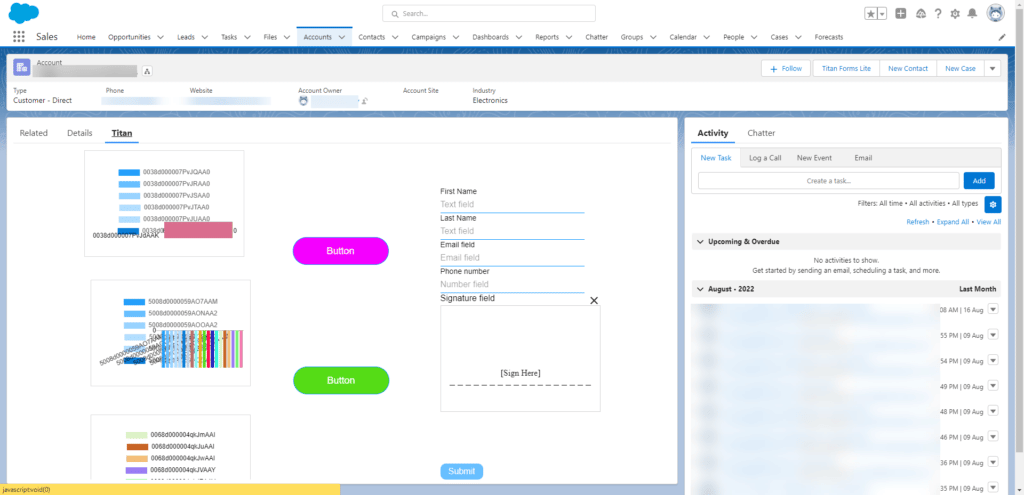
- Open the object (for instance, Account) in Salesforce. The new tab with the Web project is now visible and can be used.
Did reading this article get you interested in the power of our Salesforce integration? Read about our Native Forms and Salesforce dynamic forms