Yes - it can.
A Salesforce action button can easily be added to your form to get/push data right then and there, without having to submit the form.
However, when setting the button to act on a repeated section it applies to all of the data in all of the repeated lines.
If you wish to have your form filler press on the custom button in a specific repeated line and have it apply to this line only - you can easily do so.
Follow these steps:
1- Create a new blank form
2- Drag a section element and make it wider.
3- Drag a textbox, a numeric and a button into the section
4- Change the textbox label to : account
Go to 'Properties' panel > 'Element' tab > 'Settings' option > 'Basic' category > Label
5- Change the numeric label to num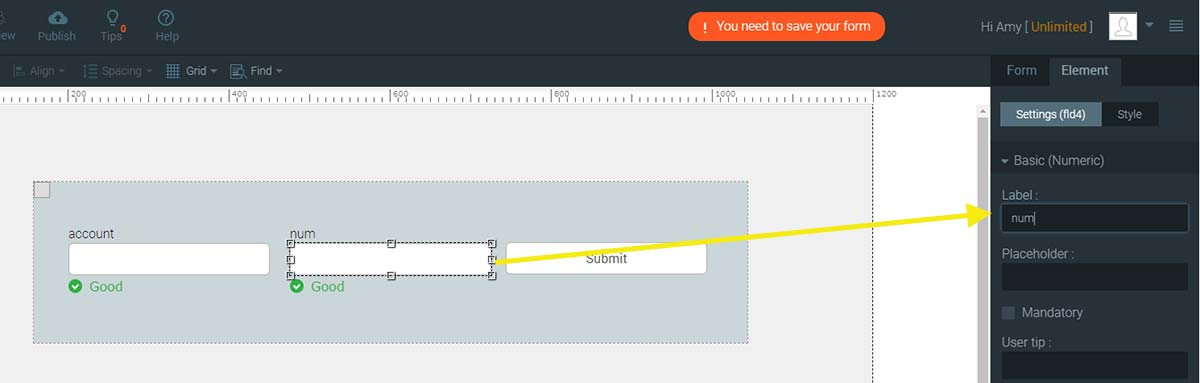
6- Change the button text to: push this item now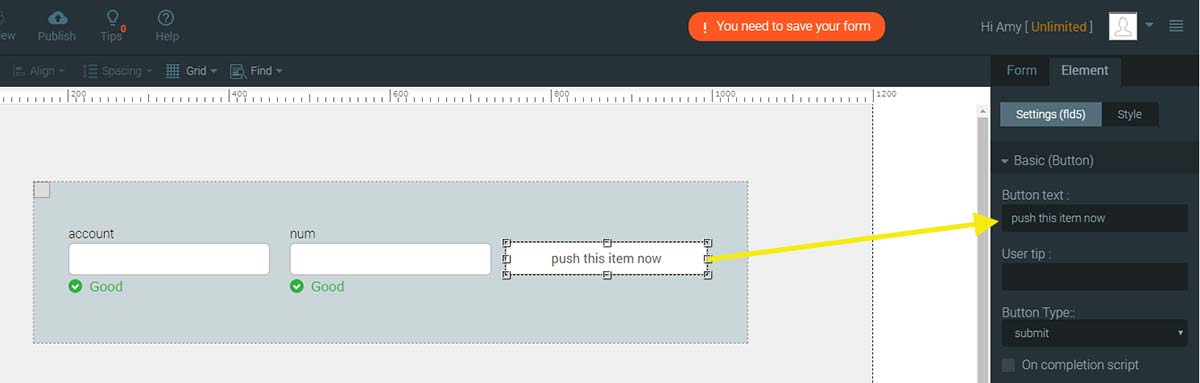
7- Select the section and make it Repeated.
Go to 'Properties' panel > 'Element' tab > 'Settings' option > 'Basic' category > Repeated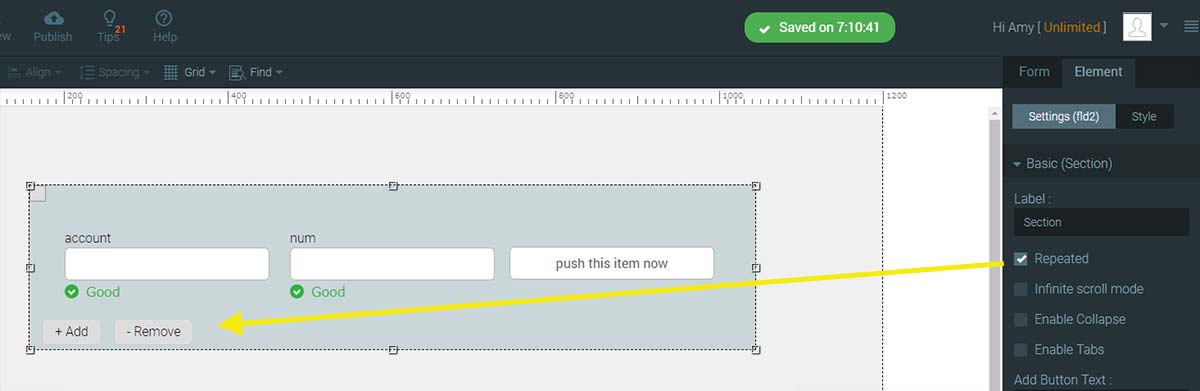
8- Now configure the Salesforce push integration
'Properties' panel > 'Form' tab > 'Settongs' option > 'Salesforce integration' category > 'Push to Salesforce'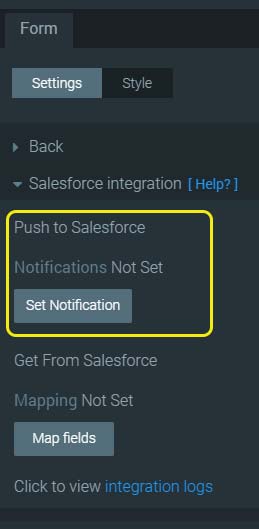
- Press on the ‘Set notofication’ button
- Authenticate with Salesforce
- Choose the account object: Account
- Turn on the 'Use in custom button' checkbox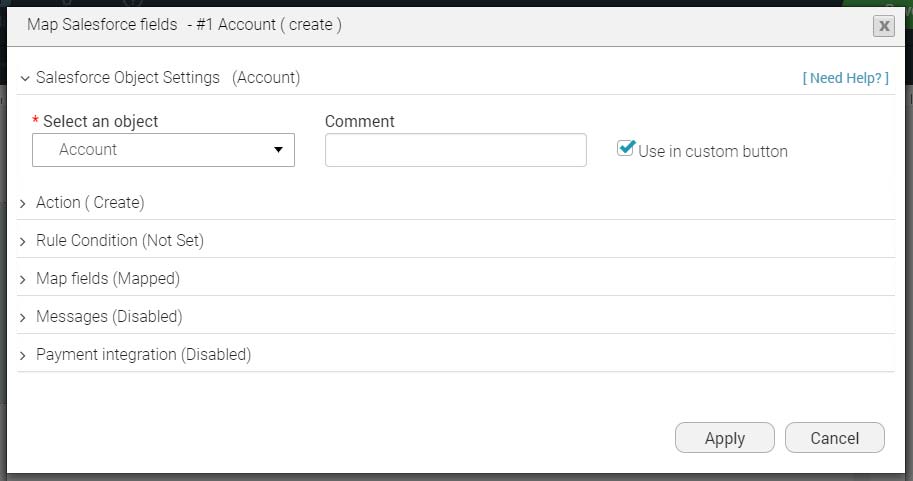
- In the 'Action' category - leave the 'Create' option selected
- Map the fields:
Account Name -->account
Num > num
- Press 'apply', then 'Finish' and save the form.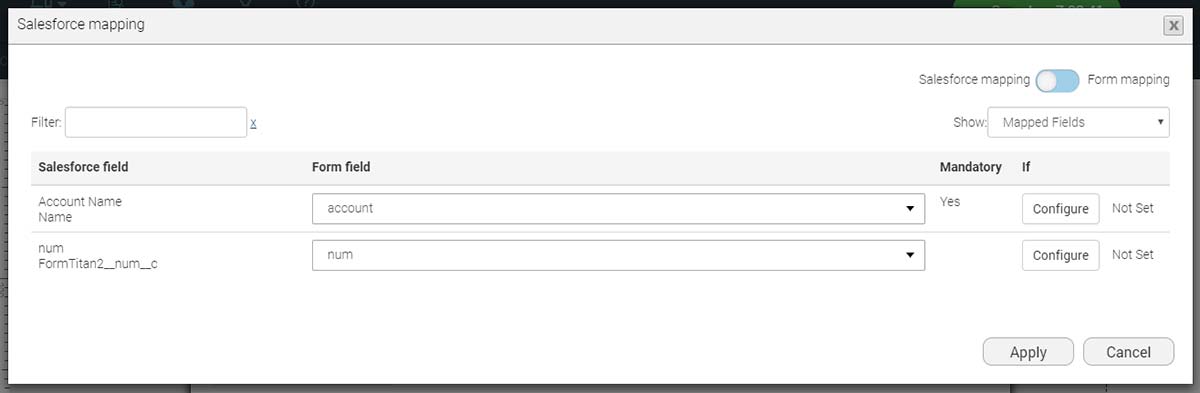
9- Select the ‘button’ and change its type to 'Salesforce Action'.
10- Press on the ‘Set’ button to have the integration line work with your custom button.
11- Open the ‘process push or get’ dropdown and select the Salesforce action.
12- Press on ‘Add’ and it will be added to a table above.
13- Turn on the ‘Execute per repeated item’ checkbox 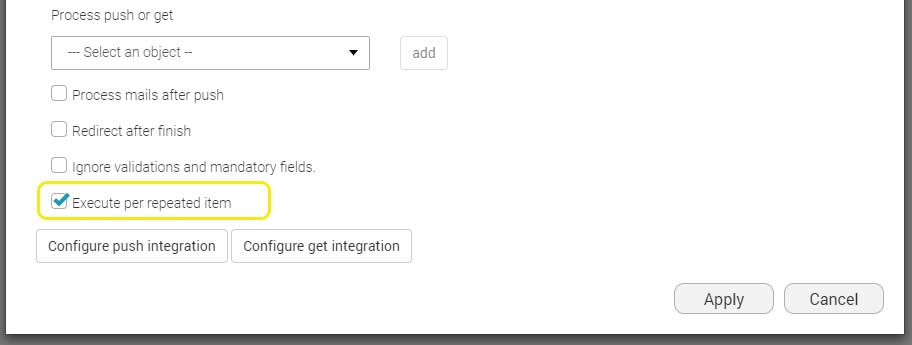
14- Press ‘Apply’ and save your form
15- Now it’s time to test your form:
- First select your Section and change your visible items to 2 and turn on the 'Populate items' checkbox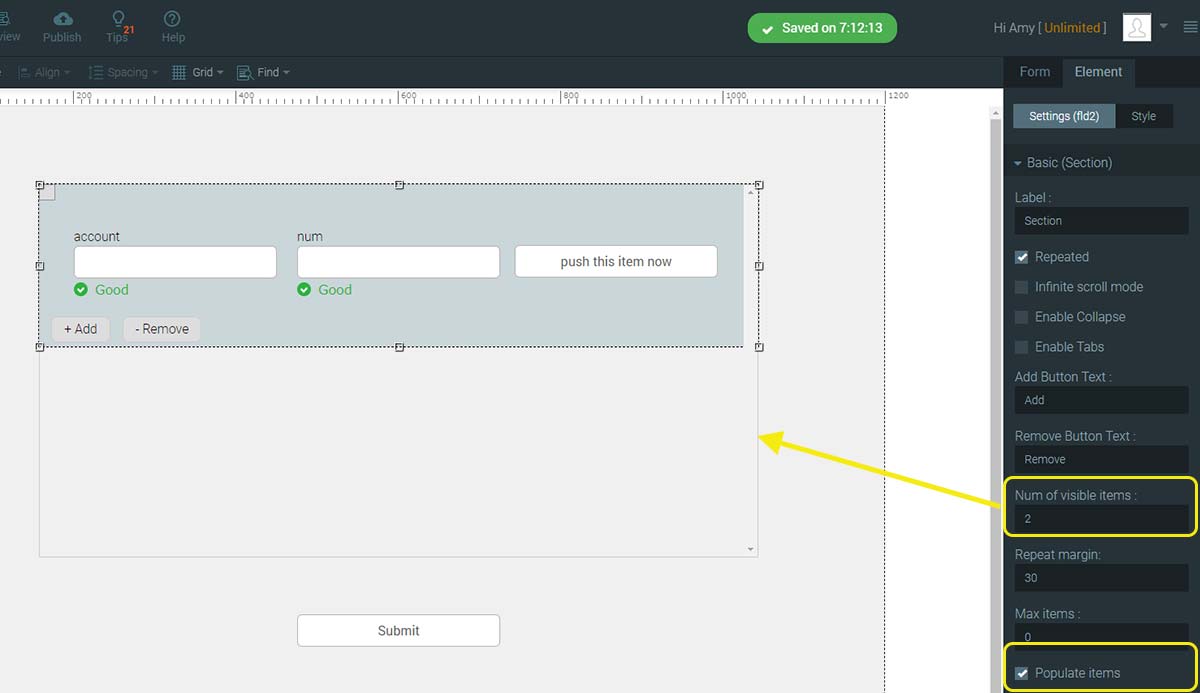
- Publish it as URL
- Enter the first item line in the section: an account name and number: test 1, 1 and test 2, 2.
- Press on “Add” and enter another item line with data: test 3, 3
- Choose a specific line (for example second line) and press on the ‘push’ button in that line. 
- Check your salesforce account and you will see that only that line of data was added as a new record.
Enjoy!
- Asking us questions is the fastest and most affective way to get assistance.
- Got a question? Check out our FAQs pages for answers to commonly asked questions.
- Check out our complete index of the FormTitan Topics organized by categories.
- Browse our topics directory to find the feature you are looking for.
- ContactStill haven't found what you were looking for? no problems... simply send us your inquiry.