Why use Hover and Selected effects?
When it comes to styling and design, we like to give our users all a large variety and flexibility to create stunning forms - this is why we added this feature. Why should you use it? well, here re a few reasons:
1- Its fun. It adds color and movement to the form.
- It makes the form more user interactive.
- It helps the filler know exactly where he is on the form.
How do I set it up?
It's really easy - all you have to do is:
1- Open your form in the form builder
2- Hover
Go to: "Properties" panel > "Form" tab > "Style" option > "Hover effect" category
3- Here you can set a background or border (or both) that will show when the mouse is above the element.
Once you set the colors here you will not be able to see them on the canvas - so be sure to publish the form and check the effect.
Go to: "Properties" panel > "Form" tab > "Style" option > "Selected effect" category.
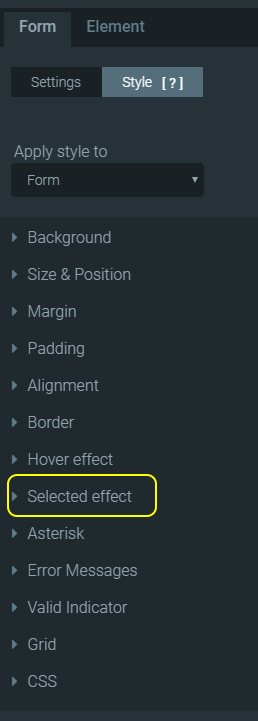
5- The content of this category is the same as in the "Hover" category. Here you can set a background or border (or both). Only this will show when the mouse clicks on the element.
Once you set the colors here you will not be able to see them on the canvas - so be sure to publish the form and check the effect.
View a Live example
in this form i have set the following hover effect:
border thickness: 2px
border color: rgba(213,231,4,1)
border shading: rgba(232,240,137,1)
and the following Selected effect:
border thickness: 2px
border color: rgba(204,148,120,1)