Setting up a Lookup field is easy.
Following are the steps:
1- Enter your form in the form builder
2- Go to "Elements" panel > "Salesforce" category
Drag the "Lookup" element onto the canvas.
3- Once the "Lookup" is selected on canvas its properties will open in the panel on the right.
(in "Properties" panel > "Element" tab > "Settings" option > "Basic" category > Mapping)
Press on the "Set" button.
4- a window will now open, where you will need to configure the Lookup:
Authentication
First, you will need to authenticate with Salesforce.
Configure SF integration
Press on the "Configure Salesforce Integration" button" to make the connection between the Lookup and the SF object.
This window looks very much alike the regular integration mapping window, only it is designed for the lookup and contains only 4 categories:
Salesforce object settings - Select the SF object you want your users to search in.
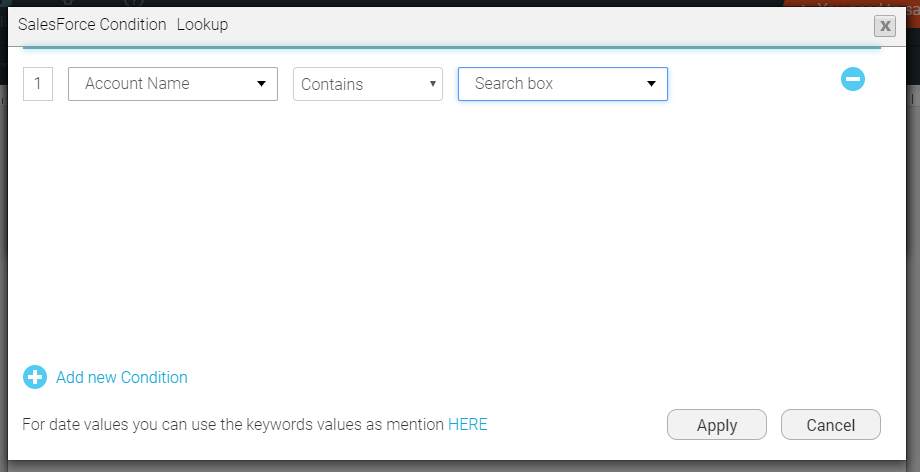
Condition - Set a condition like: Account Name Contains Search box (which means the user will enter text in the searchbox and matching items will be searched for in the "Account Name" field).
Sort order - This is not a mandatory, however you can control how the results will be sorted (according to which fields) and if the sorting is Ascending or Descending.

Configuring the results table columns
The results of the search will be displayed in a table - so now you will be required to set the columns of this table.
Open the "Add fields for display" dropdown, choose the fields, one by one, and press "Add".
Each field will be displayed in a row and will include:
Col - This is the field name
Custom label - an input box in which you can enter a different text for the field label (instead of the one specified in the Col)
Text & Value - 2 sets of vertical radio buttons that control which field will be used for the Text in the results, and which will be used to store the value.

Press "Apply" and save the form
Now you will be able to publish the form as URL and test it.
5- Testing
When your form loads you can either:
A- Enter the text inside the Lookup element and press on the "Search" button. The results will then open in a window according to your search.
B- press on the Lookup button to open it, enter a text in the search box and press on the 'Search' button.
The results will then appear according to your search.
Additional options in the Basic Lookup:
6- At the bottom of the Lookup settings window there is an option :
- Allow add record: This option will enable your filler to add a new record when he/she does not find one that suits them among the lookup results.
The Add option will appear in 2 places:
- In the Lookup auto-suggest results - as a link
- In the Lookup results window - as a button.
Once the filler presses on the link or button he/she will be redirected to another form or to a different page URL, which will Push the record to Salesforce.
-Turn on this checkbox
- You will now be required to enter the following properties:
Always / If not found: you can choose to have the 'Add record' option always displayed, or only provide it when the lookup is searched and there are no results.
- Label for item: This text will appear on the Add link (in the Lookup auto-suggest results) and on the Add button inside the Lookup window.
- Configure button: Press on this button to set the Redirect configurations.
Related videos
| Configure Salesforce Lookups in FormTitan | Multi-object Lookup for Salesforce data | Populate a Table using a Lookup | Multiple queries in a Lookup using SOSL |
Watch more videos in our FormTitan 101 channel